Learn how to install garage door weather stripping with this straightforward guide that boosts insulation, conserves energy, and shields your garage from the elements.
If you’re serious about cutting down energy costs, preventing moisture damage, and improving overall home comfort, learning how to install garage door weather stripping is one of the most effective DIY tasks you can take on. With the right approach, tools, and best practices, you can ensure your garage is well-insulated and energy-efficient year-round.
Installing weather stripping on your garage door is not just about stopping drafts—it’s a crucial step in conserving home energy. A properly sealed garage prevents hot or cold air from entering your home, reducing the strain on your HVAC system and helping to keep utility bills under control. It also keeps out pests, dust, and water, protecting your belongings and improving the overall functionality of your garage.
When to Replace It: Key Signs Before You Learn How to Install Garage Door Weather Stripping
Before you discover how to install garage door weather stripping, it’s important to know when your current seal is no longer working. Replacing worn-out weather stripping is one of the easiest ways to improve energy efficiency, keep pests out, and protect your garage from moisture and dust.
How do you know when it’s time for a garage door weather stripping replacement? Here are the most common signs to look for:
- Cracked, brittle, or flattened weather stripping: Rubber and vinyl seals naturally break down over time due to constant exposure to the elements. If the material feels dry, stiff, or crushed, it’s probably time to replace it.
- Visible gaps or light coming through: If you can see daylight at the bottom or sides of the garage door, your current seal isn’t forming a tight barrier.
- Water leaks after rain or snow: A properly sealed garage should stay dry. Puddles or moisture near the door can indicate a failing garage door seal.
- Drafts and temperature fluctuations: Feeling a breeze or noticing big temperature swings inside your garage can mean air is sneaking in through worn weather stripping.
- More bugs, dirt, or even rodents: If your garage suddenly becomes a hangout for insects or dust bunnies, your seal might not be keeping the outside in.
For best results, inspect your garage door weather stripping at least once a year, especially after harsh seasons like winter or summer. Regular checks help you catch wear and tear early—before it turns into a bigger (and more expensive) problem.
Choosing the Right Weather Stripping for Your Garage Door
Choosing the correct type of weather stripping makes all the difference when sealing your garage and protecting it from the elements. Several types of garage door weather stripping are available, each designed to seal specific areas and handle different needs. Here’s a quick breakdown of the most common options to help you decide what works best for your space:
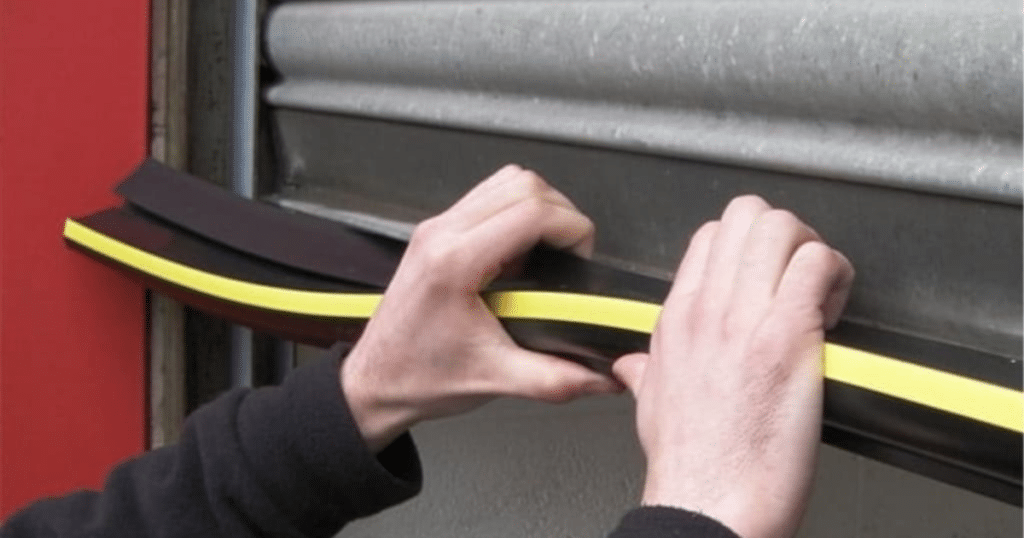
1. Bottom Seal
This is the strip attached to the bottom edge of the garage door. It compresses as the door closes to seal the gap between the door and the garage floor.
- Best for: Keeping out water, pests, and drafts—especially on uneven floors.
- Common materials: Rubber or vinyl for flexibility and durability.
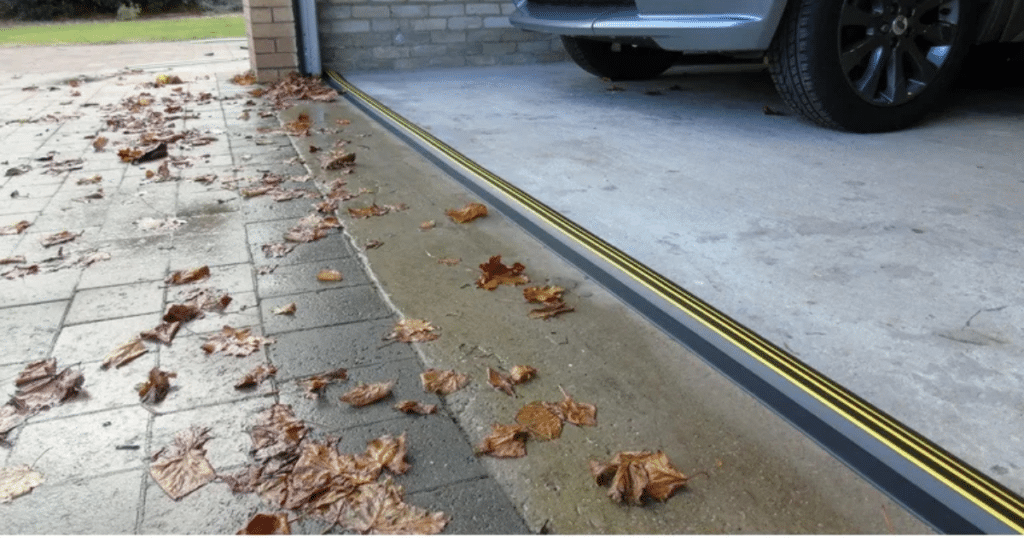
2. Threshold Seal
Unlike bottom seals, this type is installed directly on the floor of your garage, right where the door meets the ground. It works well with a bottom seal to create an extra-strong barrier.
- Best for: Preventing water and debris from flowing into the garage, especially during heavy rain.
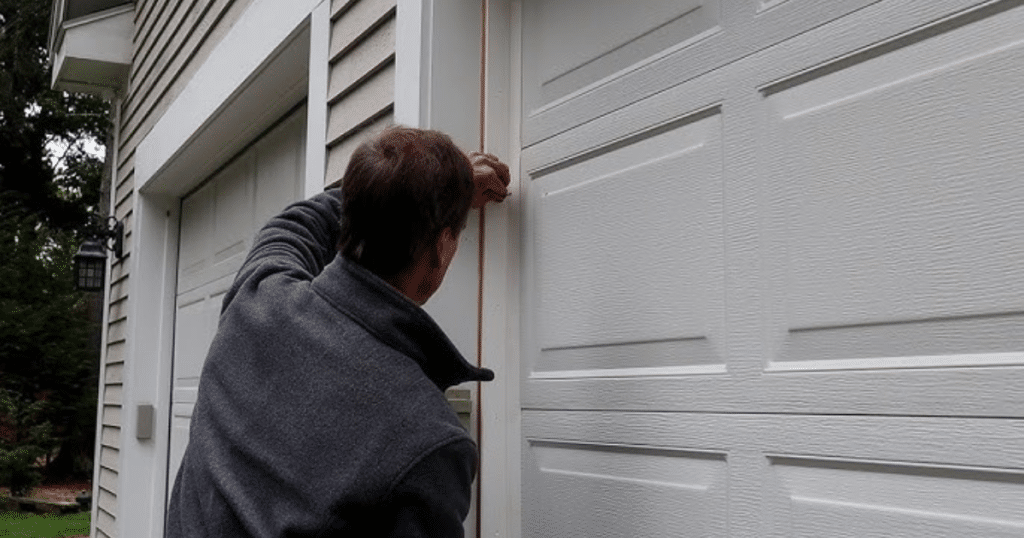
3. Side and Top Seals (Stop Molding)
These weather-stripping pieces are mounted around the sides and top of the garage door frame. They help close the gaps that can let in wind, dust, and insects.
- Best for: Creating a tight seal around your garage door.
- Materials: Foam or flexible rubber works well for most climates.
4. Brush Seals
Typically used for commercial garage doors, brush seals feature rows of bristles instead of solid rubber or foam. However, they’re also an excellent option for residential garages needing extra dust, wind, or critters protection.
- Best for: Garages in dry, dusty environments or places with a lot of wind.
Choose heavy-duty rubber or vinyl for durability and performance in varying temperatures.
Tools and Materials You’ll Need
Before you start your garage door weather stripping installation, gather all the necessary tools and materials. Having everything on hand will make the process smoother and help you avoid delays mid-project.
Here’s a checklist of what you’ll need:
Tools:
- Tape Measure – For accurately measuring the length of the door and seal areas.
- Utility Knife or Scissors – To cut the weather stripping to the correct size.
- Drill or Screwdriver – Depending on your specific weather stripping type, you’ll need one to secure it.
- Ladder – Especially useful when installing side and top weather seals, so you can reach the full door frame safely.
Materials:
- Garage Door Weather Stripping Kit – These often include pre-cut seals and necessary fasteners. Make sure to choose one that fits your door type and climate.
- Nails or Screws – Used to attach some weather stripping types, especially stop molding for the sides and top.
- Silicone Adhesive or Sealant – For threshold seals or any areas where a stronger bond or waterproof seal is needed.
Make sure to double-check your weather stripping type before starting—some kits require adhesives, while others rely on mechanical fasteners like screws or nails.
How to Install Garage Door Weather Stripping: A Detailed Guide
1. Measure and Cut the Weather Stripping
Start by measuring the width of your garage door for the bottom seal and the height of each side, plus the top for the frame seals.
- Use a tape measure for accuracy.
- Cut each piece of weather stripping to size using a utility knife or sharp scissors.
Make sure you have a snug fit—too short, and you’ll have gaps; too long, and it may bunch or buckle.
2. Remove Old Weather Stripping
Before installing the new seal, you’ll need to remove the old one.
- Use a flathead screwdriver, pry bar, or pliers to remove nails, screws, or adhesive gently.
- Clean the surface thoroughly to remove dirt, old adhesive, or debris. A clean surface helps the new weather stripping adhere properly and seal tightly.
3: Install Bottom Seal
Depending on your garage door type, you’ll either slide the new seal into a track or attach it with screws or adhesive.
- Track-style doors: Slide the rubber or vinyl seal into the bottom track channel.
- No tracking: Use screws, nails, or silicone adhesive to secure the seal directly to the bottom of the door.
Tip: The seal should be slightly compressed when the door is closed to form a tight barrier.
4: Attach Side and Top Seals
Now it’s time to install the side and top weather stripping, often called stop molding.
- Position each strip so it presses lightly against the closed door to block air and moisture.
- Secure the weather stripping using nails or screws, spacing them about 12 to 18 inches apart.
- Double-check that the seals run evenly and don’t leave any gaps, especially in the corners.
5. Test the Seal
With everything installed, close your garage door and inspect the fit:
- Look for light shining through gaps, feel for drafts, or listen for whistling winds on breezy days.
- If needed, adjust the placement of the weather stripping to tighten the seal and eliminate air or water leaks.
Best Practices to Maximize Energy Savings
- Choose weather stripping rated for your climate. Some are better suited for cold regions; others for rain or high heat.
- Inspect annually. Replace immediately if wear and tear are visible.
- Combine bottom, side, and top seals for maximum efficiency.
- Use silicone sealant to enhance adhesion and moisture protection.
- Perform this upgrade during mild weather. Adhesives bond better in moderate temperatures.
Common Mistakes to Avoid
- Not cleaning the surface before applying new seals
- Using indoor stripping instead of garage-specific products
- Over-tightening screws, causing damage to the material
- Installing in extreme cold can make rubber brittle
- Leaving gaps at the corners or edges
Avoid these to ensure your efforts in how to install garage door weather stripping pay off long term.
FAQs About Garage Door Weather Stripping
How to weatherstrip a garage door?
To weatherstrip a garage door, start by cleaning the edges and removing any old stripping. Measure and cut new weather stripping to fit the sides, top, and bottom of the door. Attach it securely using nails, screws, or adhesive, ensuring a snug seal without interfering with door movement.
Does garage door weather stripping work?
Yes, garage door weather stripping is effective at sealing gaps around the door. It helps block out drafts, moisture, dirt, and pests. Properly installed weather stripping also improves energy efficiency by stabilizing the garage temperature.
What is door weather stripping called?
Door weather stripping, commonly referred to as weather seal, door seal, or garage door seal, includes materials like rubber, vinyl, foam, or metal. It is designed to fill gaps and create a tight seal around doors.
What are the three types of weather stripping?
The three main types of weather stripping are adhesive-backed foam tape, V-strip (tension seal), and door sweeps. Foam tape is easy to install and is used for irregular gaps. V-strips are suitable for sealing the sides of doors, and door sweeps seal the gap at the bottom.
How to apply door weather stripping?
To apply door weather stripping, clean and dry the surface where it will be installed. Measure and cut the stripping to fit, then peel off the backing (if adhesive) or use nails/screws to secure it. Press it firmly into place to create a tight seal around the door.
Conclusion
Properly sealing your new garage door is one of the most efficient upgrades you can make for your home. It’s a small effort with big results, from improving energy efficiency and lowering bills to keeping pests and moisture at bay. Whether you’re prepping for winter or just enhancing comfort, knowing how to install garage door weather stripping is a valuable homeowner skill.
The DIY route is cost-effective and doable with the right tools and knowledge. However, it might be worth hiring a professional to ensure flawless installation for busy homeowners or those with specialized garage doors.
If you’re in the Raleigh or Durham area and want expert assistance, DoorJam Garage Repair is here to help. We offer reliable, local service focusing on energy savings, quality workmanship, and customer satisfaction. Contact us today for an evaluation or installation service.
End Note
DoorJam Garage Repair doesn’t just fix or install garage doors—we create solutions designed to elevate your home’s security, efficiency, and aesthetic appeal. With deep local roots and a commitment to quality, our team specializes in everything from basic garage door repairs to complete garage door overhauls.
Explore our full range of garage door services, including new garage door installation, garage door replacement, and fast, reliable repairs throughout the Triangle area. We proudly serve Raleigh, Durham, and Wake Forest with dependable service and trusted expertise.
Learn more about us, connect with us on Instagram or Facebook, or contact us directly for a personalized quote or consultation. Let DoorJam be your trusted choice for garage door excellence across North Carolina.