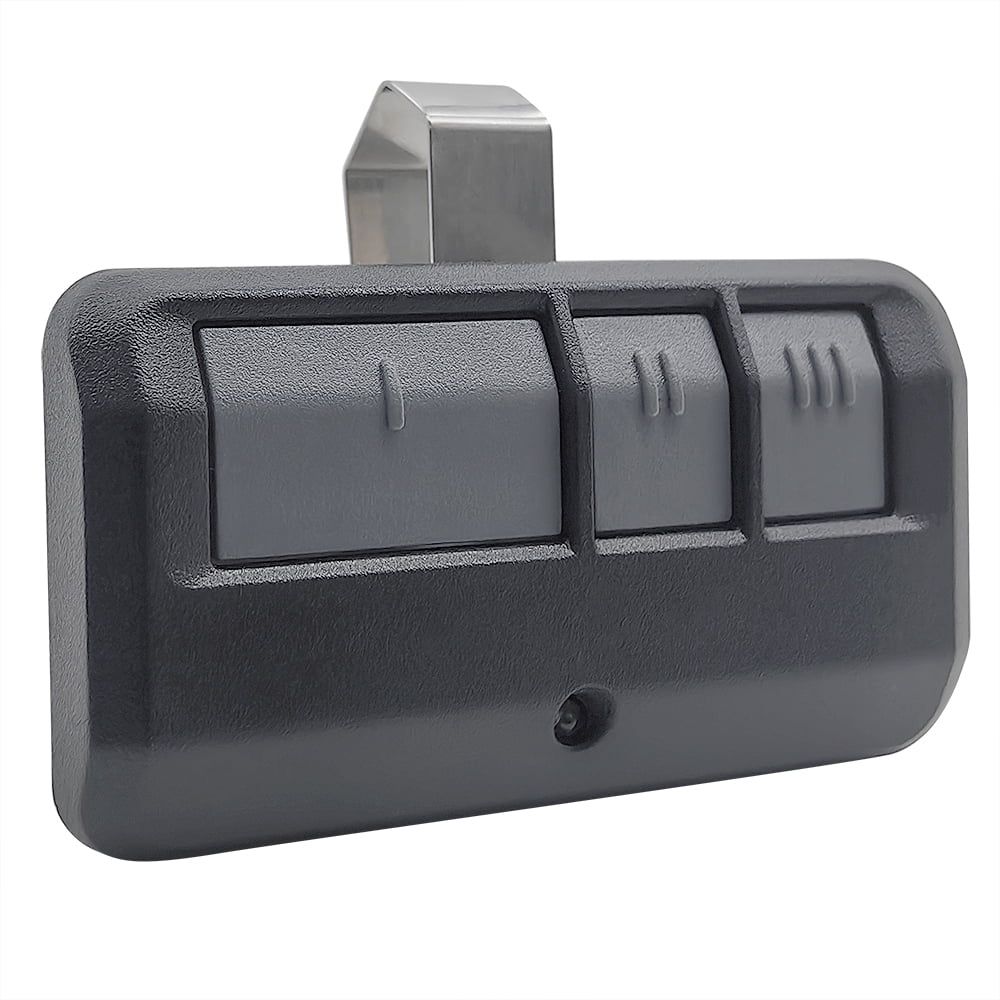
A Chamberlain garage door remote lets you control your garage door opener via a secure wireless signal, allowing you to open the door from inside your vehicle or driveway. When the remote becomes unresponsive, damaged, lost, or inconsistent, replacing it correctly restores reliable access and protects system security.
Many replacement issues stem from model incompatibility, learn-button pairing errors, or incomplete syncing with the garage door opener receiver. Understanding how to properly replace and connect a new Chamberlain garage door remote helps prevent signal interference, repeated programming failures, and disruptions to daily access.
Do You Need to Replace or Reprogram a Chamberlain Garage Door Remote?
When a Chamberlain garage door remote stops responding consistently, loses range, or fails after battery replacement, the underlying issue is often tied to internal hardware damage, signal interference, or pairing memory conflicts within the garage door opener receiver.
Common reasons replacement may be necessary include:
- Physical cracks or impact damage affecting the internal circuit board.
- Corroded battery terminals are interrupting consistent power flow.
- A worn programmed button that no longer transmits a full signal.
- Repeated pairing failures caused by memory overload in the opener.
- Interference that disrupts communication between the remote and receiver.
To understand how pairing loss and signal issues impact daily use before replacing the device, read our guide on How Do You Program a Chamberlain Garage Door Remote?, which explains how proper synchronization restores communication between the remote and opener.
Replacement Steps for a Chamberlain Garage Door Remote
Step 1: Confirm Opener Model, Learn Button Color, and Compatibility
Correct remote replacement begins with identifying the exact garage door opener model and matching it to the proper learn button color inside the motor housing.
Verification points include:
- Locate the opener label mounted on the ceiling unit.
- Lift the light cover to inspect the color of the learn button.
- Match yellow, purple, red, or green buttons to compatible remote series.
- Review manufacturer compatibility charts for signal frequency alignment.
- Confirm support for rolling code technology before purchasing.
Chamberlain explains how learn button colors connect to radio technology and accessory compatibility, helping confirm whether a Chamberlain garage door remote will pair correctly with a specific opener.
Step 2: Identify Remote Series and Frequency Requirements
Model matching prevents signal rejection, range problems, and failed pairing attempts during Chamberlain garage door remote replacement.
Important identification checks involve:
- Inspect the back panel for a printed model number.
- Open the battery compartment to review internal labels.
- Compare the frequency markings listed in the documentation.
- Confirm Security+ or Security+ 2.0 compatibility.
- Verify transmitter type before selecting a universal remote.
Accurate series identification reduces programming delays and avoids conflicts between older Chamberlain systems and newer encryption standards.
Step 3: Decide Between OEM and Universal Replacement Options
Remote selection affects long-term signal reliability, encryption compatibility, and daily garage door access performance.
Selection considerations may include:
- Choose OEM units for guaranteed compatibility.
- Evaluate build quality and button durability.
- Compare signal range ratings between brands.
- Confirm encryption support for newer systems.
- Review warranty coverage before purchase.
Universal remote models can function properly when compatibility is aligned, but OEM Chamberlain garage door opener remote devices typically provide smoother pairing and more stable performance.
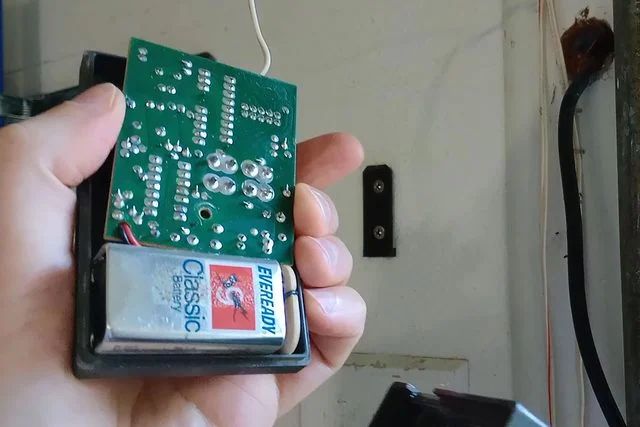
Step 4: Install a Fresh Battery and Confirm Remote Power
A stable voltage supply ensures the remote control transmits a clean signal to the garage door opener receiver during pairing.
Power inspection steps involve:
- Insert the correct battery type recommended by the manufacturer.
- Examine terminals for corrosion or loose metal contacts.
- Press each programmed button to confirm the LED response.
- Replace weak batteries even if the indicator light appears faint.
- Secure the battery cover tightly before testing.
Weak or inconsistent signal transmission can sometimes trace back to broader system wear, and a professional garage door tune-up can identify voltage or component strain affecting overall performance.
Step 5: Clear Old Remote Memory From the Opener
Memory reset protects system security and prevents pairing conflicts when replacing a lost or damaged remote control.
Reset actions typically include:
- Press and hold the learn button until the LED turns off.
- Release once memory clears completely.
- Wait briefly before re-entering pairing mode.
- Confirm that no previous remotes activate the door.
- Reprogram only approved remotes afterward.
Erasing stored codes strengthens access control and reduces the risk of unauthorized entry after replacing a Chamberlain garage door remote.
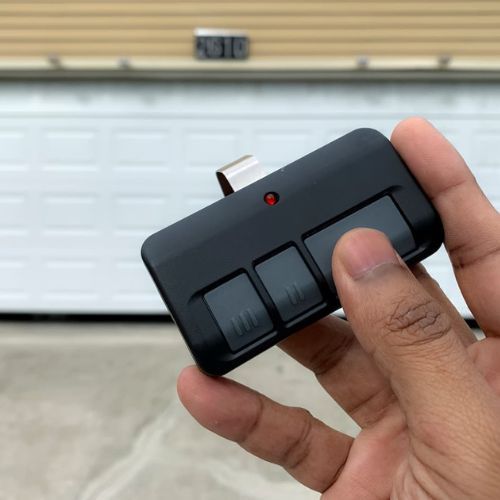
Step 6: Pair the New Remote Using the Learn Button
Successful pairing links the remote transmitter to the opener receiver via a timed-learn button-activation sequence.
Pairing steps include:
- Press the learn button once to activate pairing mode.
- Within 30 seconds, press the selected remote button firmly.
- Watch for the opener light to blink as confirmation.
- Release the programmed button after visual signal feedback.
- Test the garage door movement immediately after pairing.
Chamberlain explains that pressing the learn button opens a short pairing window inside the receiver, which determines whether the remote successfully syncs with the garage door opener.
Step 7: Test Signal Range and Door Response
Signal strength testing confirms reliable communication between the Chamberlain garage door remote and the garage door opener receiver.
Performance checks may include:
- Stand at driveway distance to confirm range consistency.
- Observe the speed of door movement during open and close cycles.
- Inspect the antenna wire hanging from the motor unit.
- Confirm safety sensor alignment during closing.
- Verify reversal response when obstruction is detected.
If signal testing reveals uneven door movement or hesitation during travel, underlying alignment problems may require garage door track repair to restore stable operation.
Step 8: Program Multi-Button Remotes for Multiple Doors
Multi-button configuration allows one Chamberlain garage door remote to control separate openers without signal overlap.
Setup steps involve:
- Assign one button per garage door system.
- Activate learn mode for each opener individually.
- Pair buttons separately to avoid memory conflicts.
- Label buttons for organized access control.
- Test each opener response independently.
Organized button programming supports households with multiple vehicles, a door opener keypad, or integrated MyQ access systems.
Step 9: Secure the Remote and Review Household Access
Replacement also presents an opportunity to improve access control and confirm secure operation of the entire garage door system.
Security measures may include:
- Store visor remotes securely inside vehicles.
- Remove lost remotes from memory immediately.
- Update keypad entry codes for additional protection.
- Confirm myQ mobile app permissions remain accurate.
- Limit spare remote distribution to trusted users.
Secure storage and updated access settings protect the Chamberlain garage door system from unauthorized activation while maintaining smooth daily operation.
Choosing the Right Chamberlain Garage Door Remote Replacement
Selecting the correct Chamberlain garage door remote replacement ensures secure signal transmission, smooth operation of the garage door opener, and long-term compatibility with your existing system.
Key factors to evaluate include:
- Match the remote to your opener’s learn button color and frequency.
- Confirm Security+ or rolling code compatibility for encrypted access.
- Decide between a visor, a keychain, or a multi-button format based on daily use.
- Verify compatibility with integrated systems, such as myQ or a door-opener keypad.
- Compare OEM models against a universal garage door opener device if considering alternatives.
Careful model matching and compatibility review reduce pairing failures, signal interference, and unnecessary delays in replacement.
OEM vs Universal Remote Control for Chamberlain Garage Door Opener
Remote selection affects long-term signal stability, encryption compatibility, and the reliability with which your garage door opener responds during daily operation in Wake Forest, NC.
Comparison Factor | OEM Chamberlain Remote | Universal Remote |
Brand Matching | Designed specifically for Chamberlain systems | Built to work across multiple brands |
Pairing Process | Typically smoother and faster synchronization | May require additional compatibility steps |
Encryption Support | Fully aligned with Security+ technology | Some models may not support newer encryption |
Signal Consistency | Stable range matched to factory specifications | Range can vary by manufacturer |
Firmware Compatibility | Matches the receiver software design | Possible compatibility limitations with newer openers |
Warranty Coverage | Backed by the manufacturer’s warranty | Warranty varies by brand |
Integration With myq | Designed to work alongside supported smart systems | Smart integration may not be supported |
Choosing between OEM and universal replacement depends on compatibility, encryption requirements, and how consistently you want the Chamberlain garage door remote to perform with your existing garage door opener system.
Why a New Remote Won’t Pair After Replacement
Pairing failure after installing a new Chamberlain garage door remote usually indicates a timing error, memory conflict, signal interference, or a receiver issue within the garage door opener system rather than a defective remote.
Common causes include:
- Learn button timing window expires before the remote signal is transmitted.
- The memory inside the opener is full, preventing the storage of new remote codes.
- LED bulbs or nearby electronics can interfere with radio-frequency signals.
- Damaged antenna wire reduces signal strength between the remote and receiver.
- Logic board faults block proper communication with the remote control.
Signal rejection and repeated pairing attempts often point to deeper opener communication issues, as detailed in our blog on Why Won’t My Chamberlain Garage Door Remote Connect?, where signal breakdowns and receiver faults that disrupt remote synchronization are examined.
When Replacement Should Include a System Access Review
Replacing a Chamberlain garage door remote can require a broader review of system access, especially when lost devices, shared use, or outdated codes affect how the garage door opener responds.
Situations that may require a full access review include:
- Lost or stolen remote control devices that may still be stored in opener memory.
- Rental property turnover where previous users had programmed access.
- Multi-vehicle households with several remotes paired to one opener.
- Outdated entry codes on a connected keypad.
- Expanded use of MyQ access requires permission updates.
Access conflicts and stored memory issues can continue disrupting signal stability even after installing a new remote, and our guide on How to Reset a Chamberlain Garage Door Remote explains how clearing stored codes restores secure synchronization and prevents recurring pairing problems.
Restore Reliable Access by Replacing Your Chamberlain Garage Door Remote Today
Replacing a Chamberlain garage door remote requires more than simply replacing the device; proper compatibility checks, correct learn-button pairing, and full signal testing ensure your garage door opener responds safely and consistently. Accurate replacement protects system security, prevents recurring programming issues, and restores smooth daily garage door operation.
DoorJam Garage provides professional Chamberlain garage door remote replacement and support for homeowners throughout Wake Forest, NC. If your remote will not sync, signal range keeps dropping, or you need secure access restored quickly, contact us or give us a call today for reliable local service you can trust.